Honda Silver Wing Scooter Forum


HomeHome  GalleryGallery  FAQFAQ  SearchSearch  RegisterRegister  Log inLog in  
Search


Display results as :
 
Rechercher Advanced Search
Latest topics
» LF extended back rest
Clutch Bell, How to remove & replace I_icon_minitimeby Rzor93 Today at 4:29 pm

» Goodbye guys
Clutch Bell, How to remove & replace I_icon_minitimeby Rzor93 Today at 4:27 pm

» noise under load
Clutch Bell, How to remove & replace I_icon_minitimeby dmosemorris Yesterday at 1:30 pm

» checking the oil
Clutch Bell, How to remove & replace I_icon_minitimeby arcamedies13 Yesterday at 9:32 am

» Ignition wires to which plug?
Clutch Bell, How to remove & replace I_icon_minitimeby Terry Smith Thu May 16, 2024 6:39 pm

» Hello from Illinois!
Clutch Bell, How to remove & replace I_icon_minitimeby DescendingRaven Wed May 15, 2024 2:13 pm

» Silverwing Brakes
Clutch Bell, How to remove & replace I_icon_minitimeby Terry Smith Tue May 14, 2024 11:57 pm

» Anyone have a trailer hitch for sale
Clutch Bell, How to remove & replace I_icon_minitimeby BrianInVA Mon May 13, 2024 12:53 pm

» Left brake micro-switch
Clutch Bell, How to remove & replace I_icon_minitimeby Johnboy Fri May 10, 2024 7:57 pm

» Car tire for towing with a Silverwing?
Clutch Bell, How to remove & replace I_icon_minitimeby BrianInVA Fri May 10, 2024 5:36 pm

Navigation
 Portal
 Index
 Memberlist
 Profile
 FAQ
 Search
free forum


 Clutch Bell, How to remove & replace

Go down 
2 posters
AuthorMessage
Loosemarbles
Site Admin
Loosemarbles


Number of posts : 1570
Age : 62
Location : South East England
Points : 4533
Registration date : 2016-10-01

Clutch Bell, How to remove & replace Empty
PostSubject: Clutch Bell, How to remove & replace   Clutch Bell, How to remove & replace I_icon_minitimeSat Mar 23, 2019 11:28 am

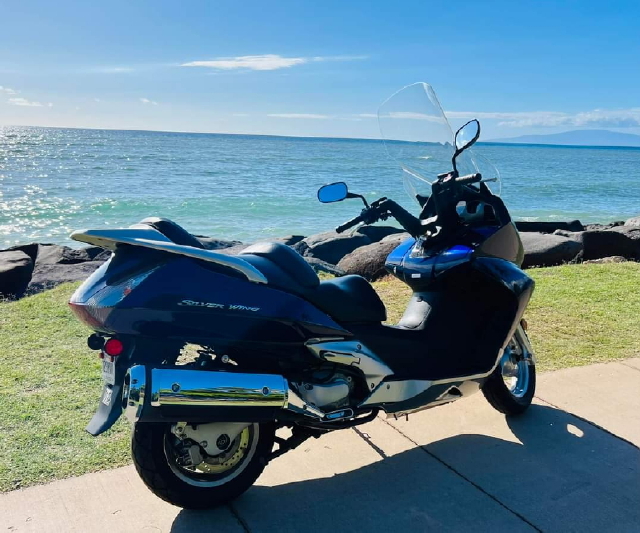
Clutch outer removal and replacement. I have just done this job without using the Honda 'special tool'.

Gathering other information from this forum I include some pictures of how it can be done. I have started from getting to the point where the covers and drive faces have been removed and you're ready to get stuck in. The reason for this is because there is already plenty of info on this forum and videos on You Tube to get down to this point.

Clutch Bell, How to remove & replace 01_ope12


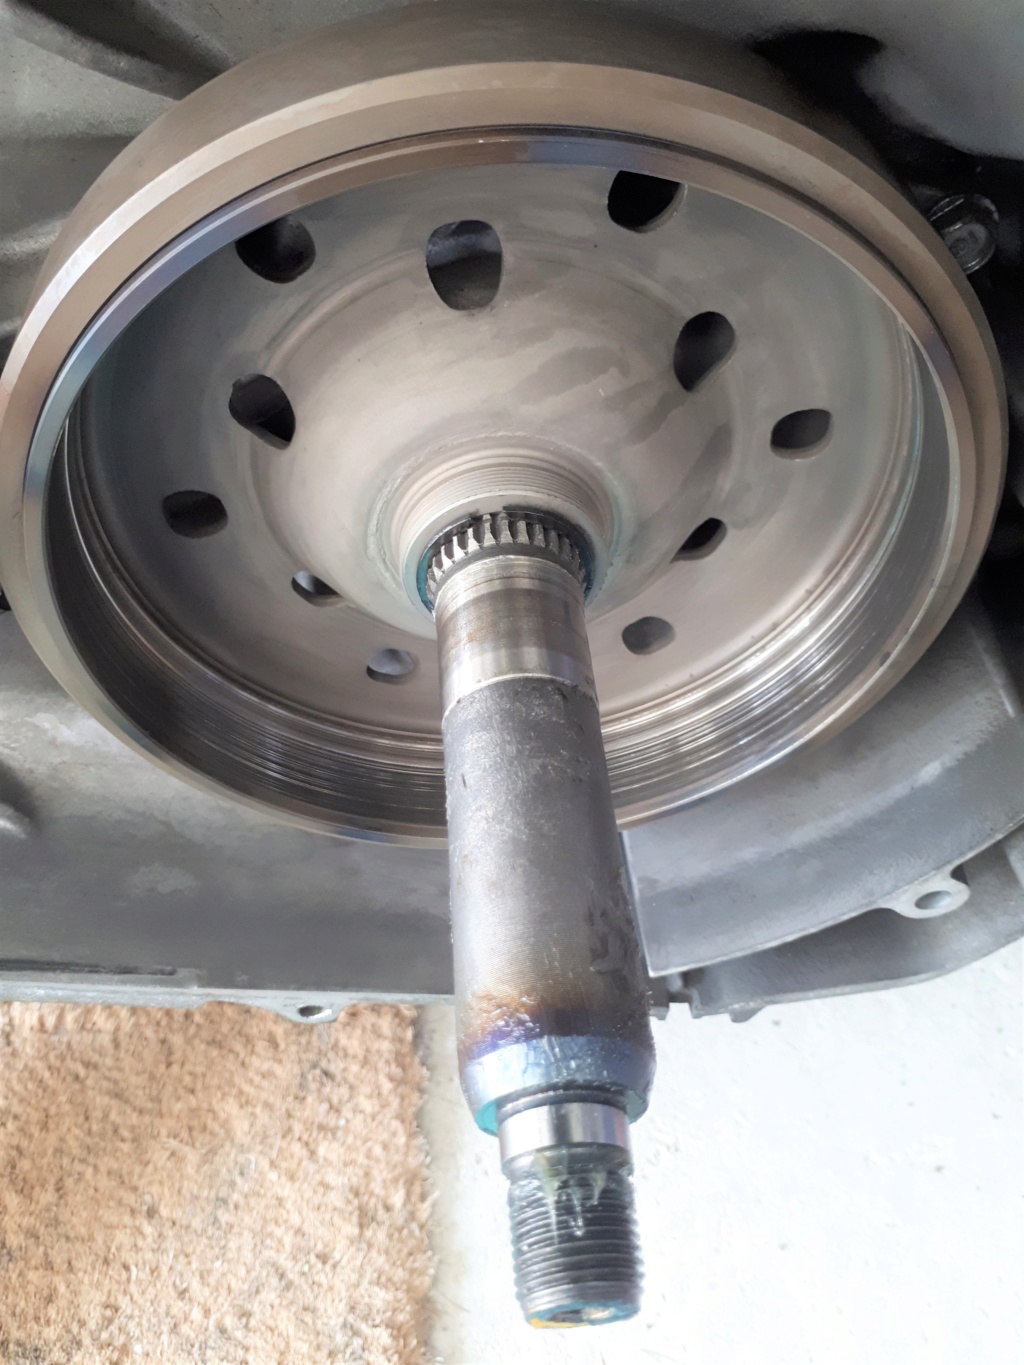
I removed the circlip, which holds the outer to the shaft, with some angled pliers. I placed them into the gap in the circlip and prised the spring apart.  With a bit of manipulation and dexterity it popped free.

Clutch Bell, How to remove & replace 03_str12

Clutch Bell, How to remove & replace 04_cir11

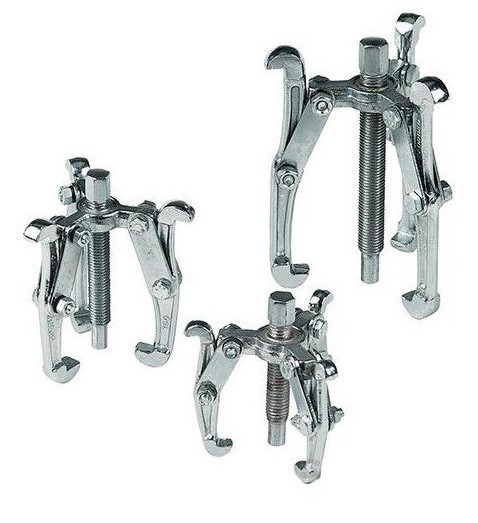
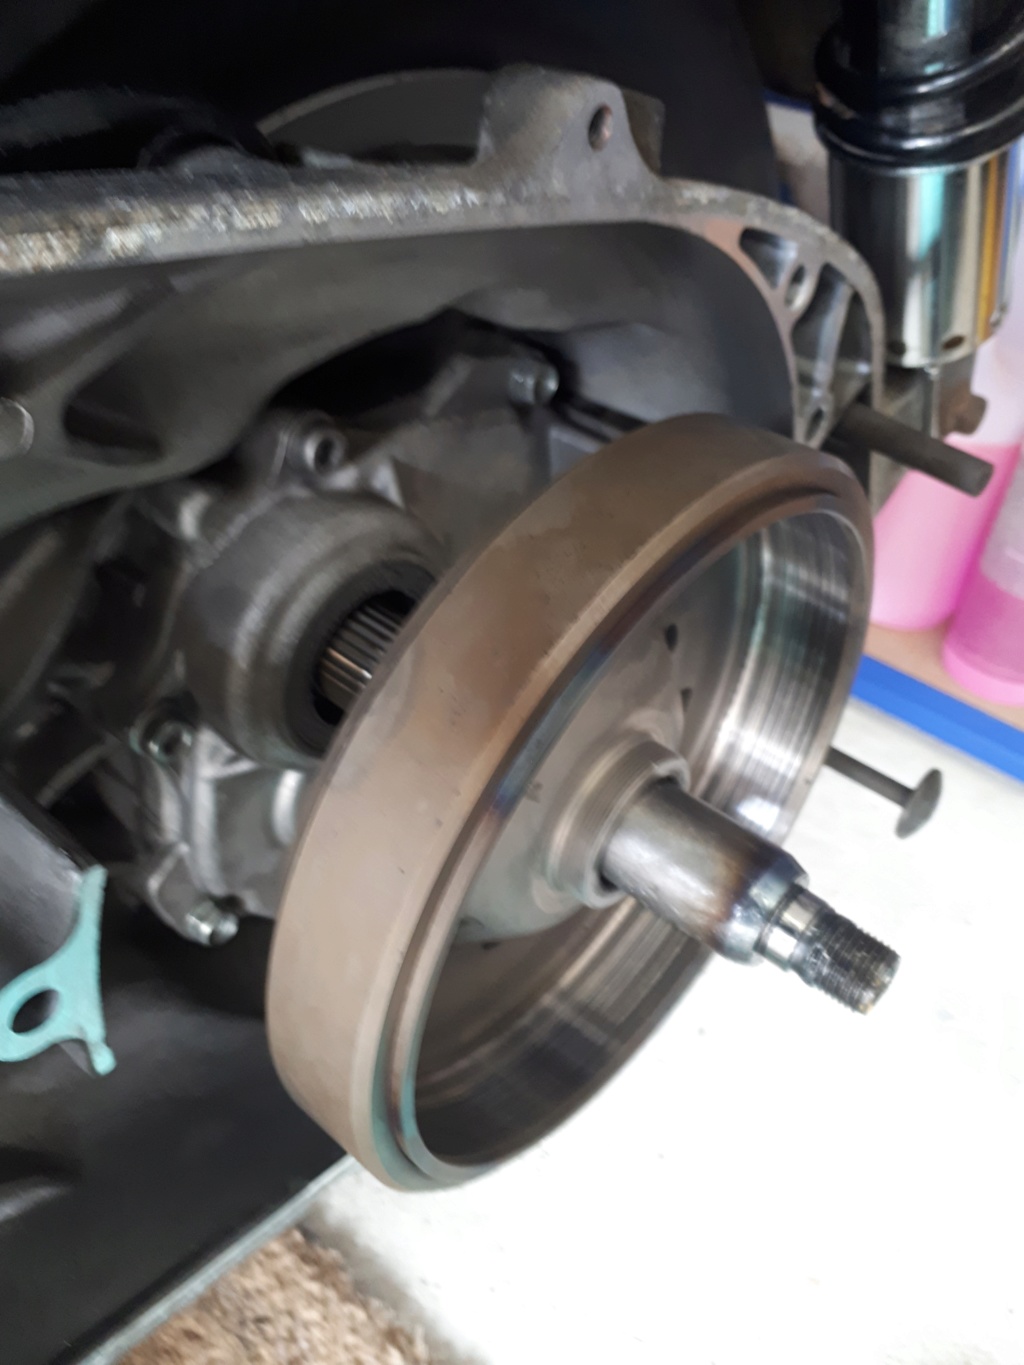
Next, the puller. You can buy a long-legged puller but I went down the cheap route. I bought a set of three different sized pullers, non of which would do the job. When dismantled and rebuilt, one of them could be made to fit.

Clutch Bell, How to remove & replace 05_pul11

By using the largest puller as the one to do the job I dismantled the other two so that I could use the 'legs' to extend the reach of the largest one.

Clutch Bell, How to remove & replace 06_clu11

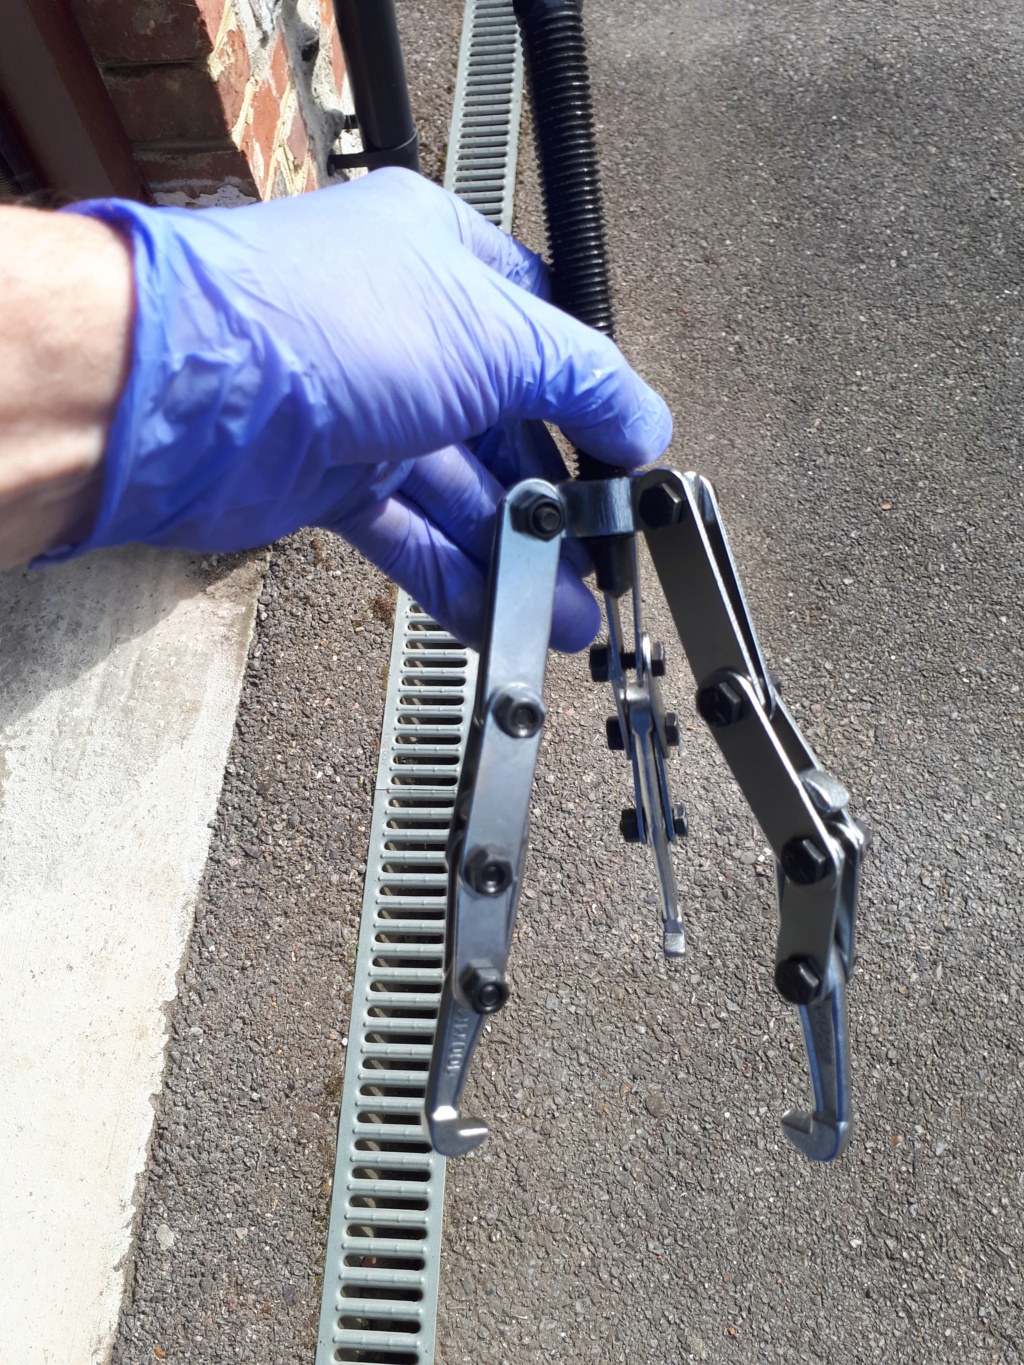
I attached the medium puller's legs onto the largest puller's legs and then attached the smallest puller's legs to the medium puller's legs, creating one long flexible set of legs. Then I attached the medium puller's claws onto the end. The medium puller's claws seem to fit the holes on the clutch outer best.


Clutch Bell, How to remove & replace 07_clu12

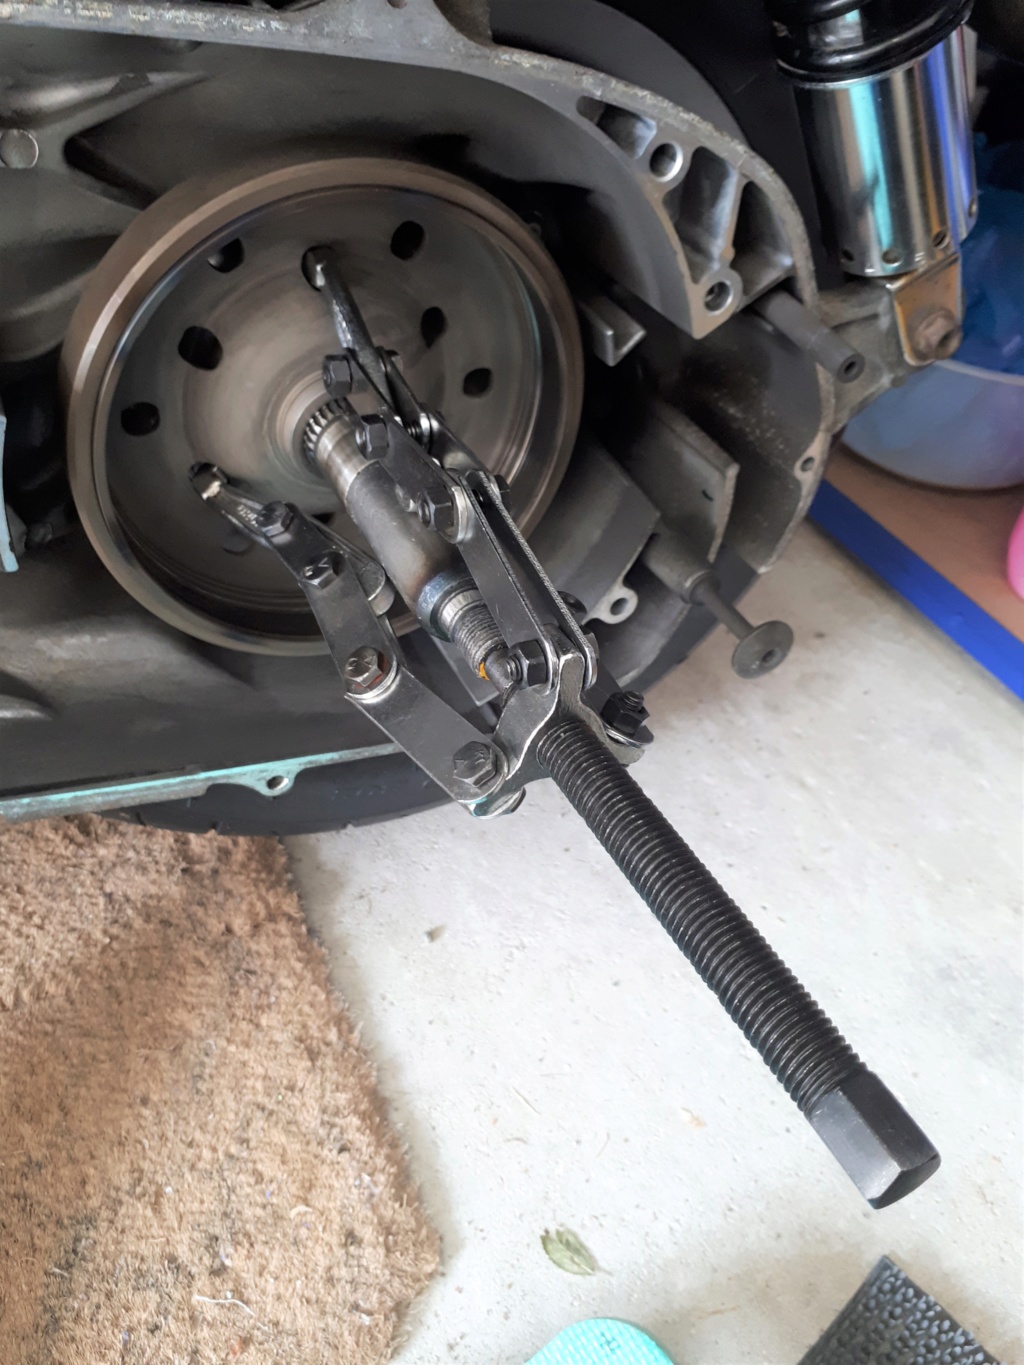
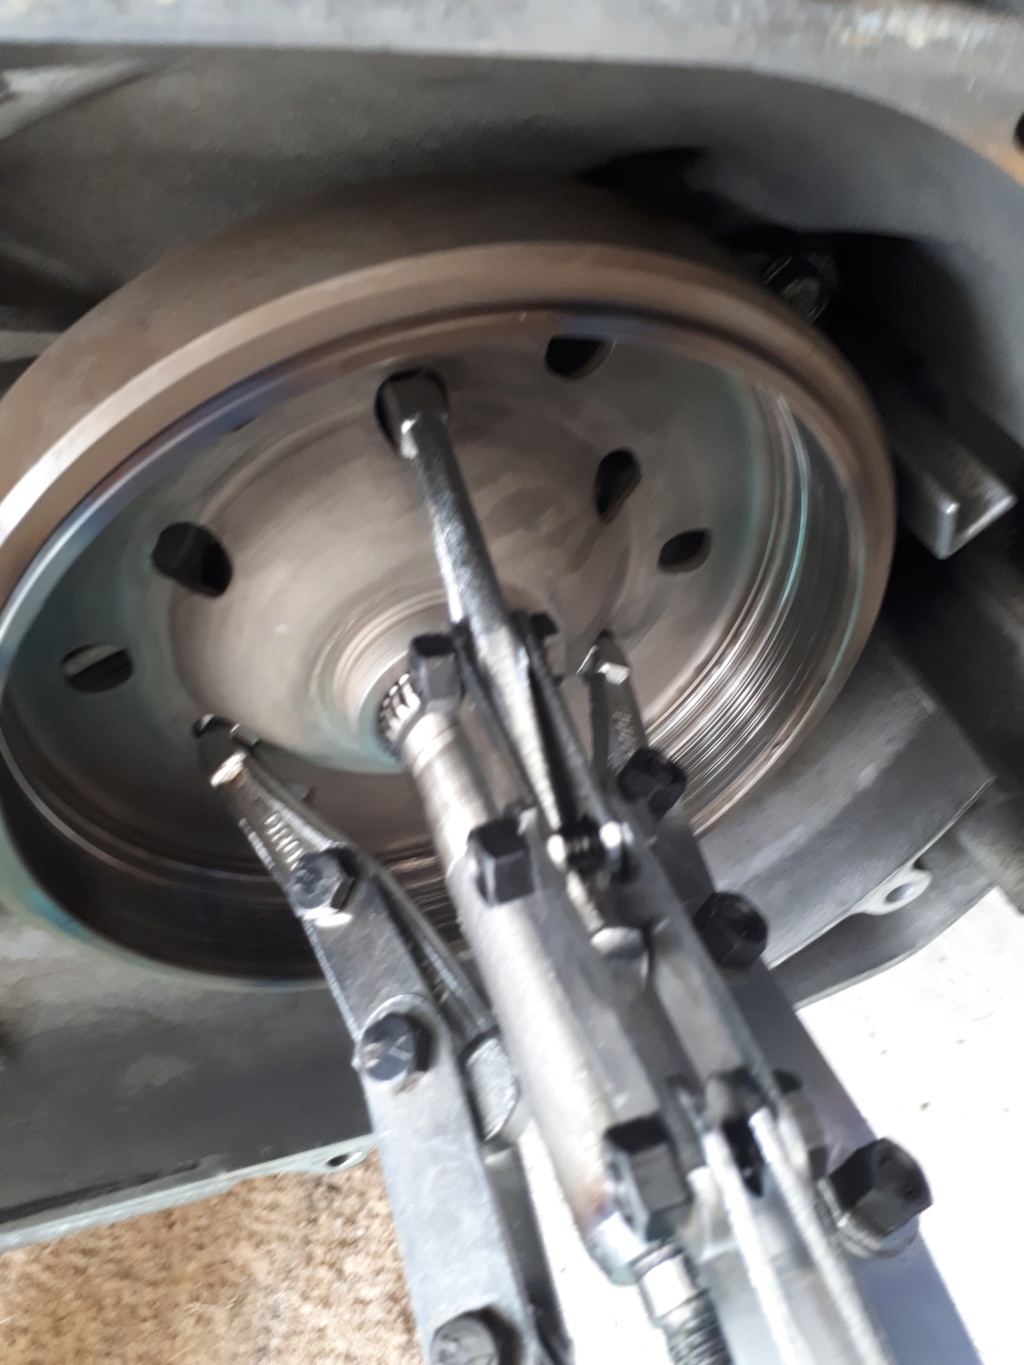
You might notice that the three claws do not go into equally spaced holes in the clutch outer. Two fit into the inner holes and one claw has to go into one of the outer holes. This didn't affect the operation. (examine the picture).


Clutch Bell, How to remove & replace 08_clu11

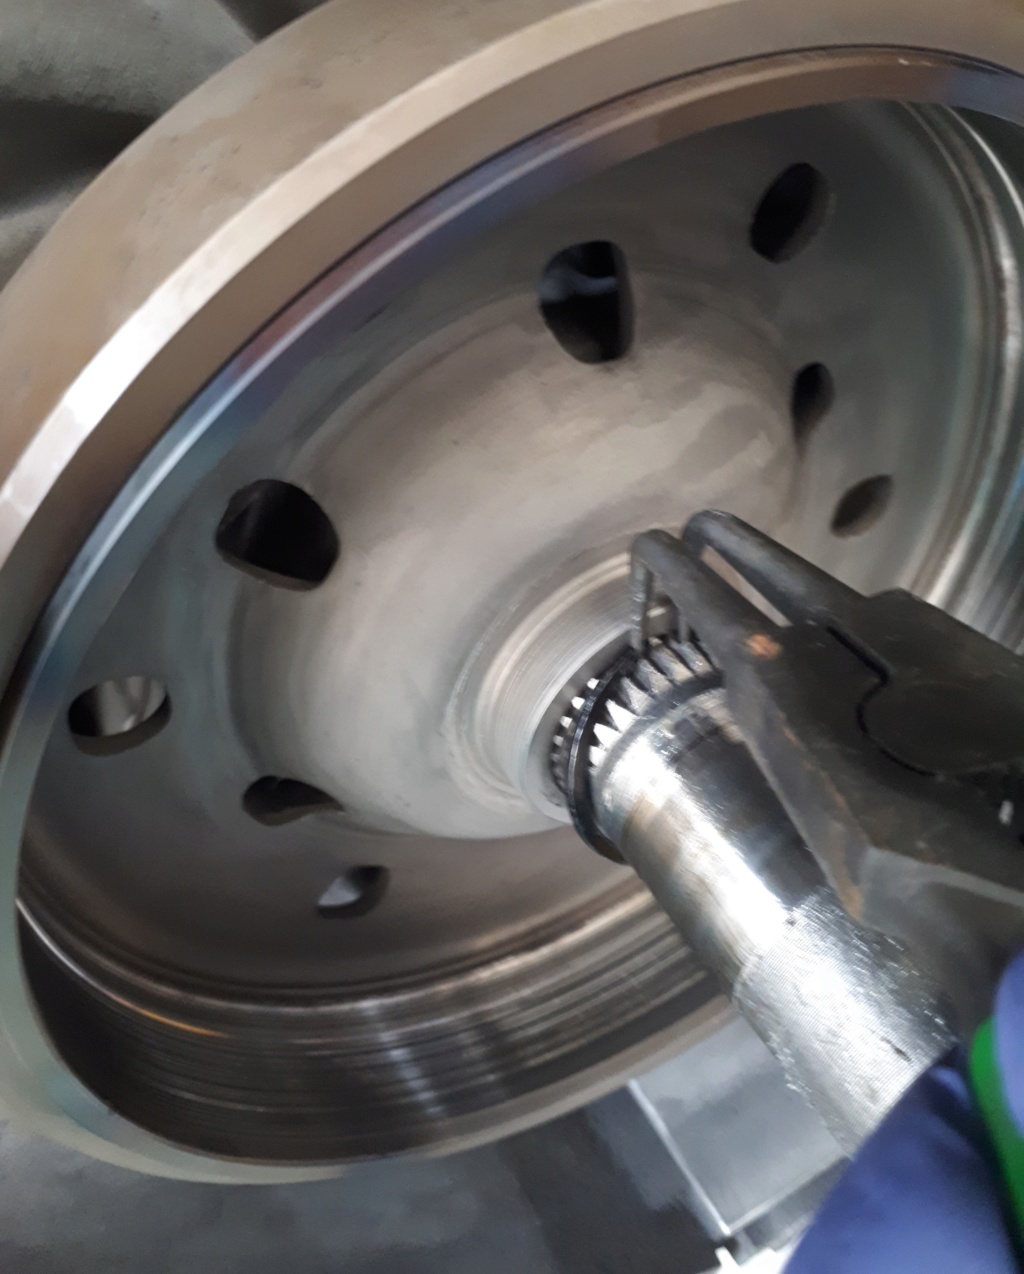
Start turning the nut ! There was a 'snap' as the outer broke free and then a creaking noise as is eased away from the splines. Then it was free...


Clutch Bell, How to remove & replace 09_clu11

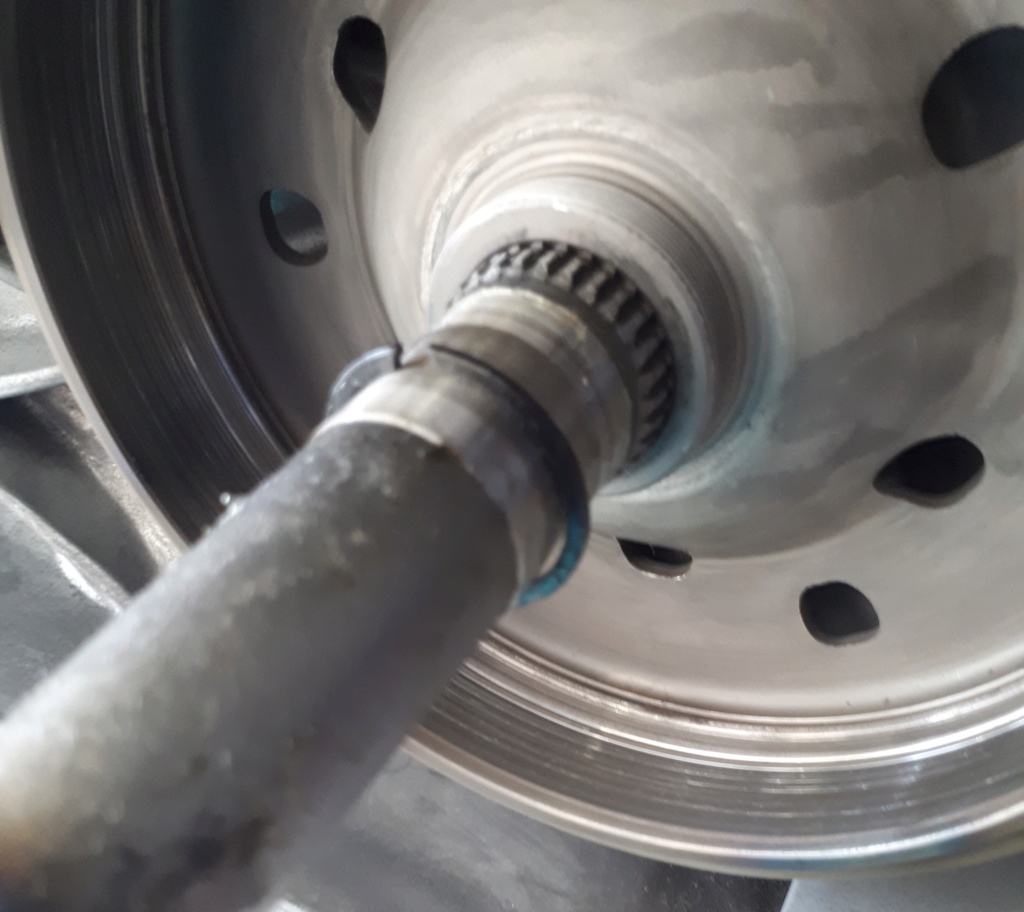
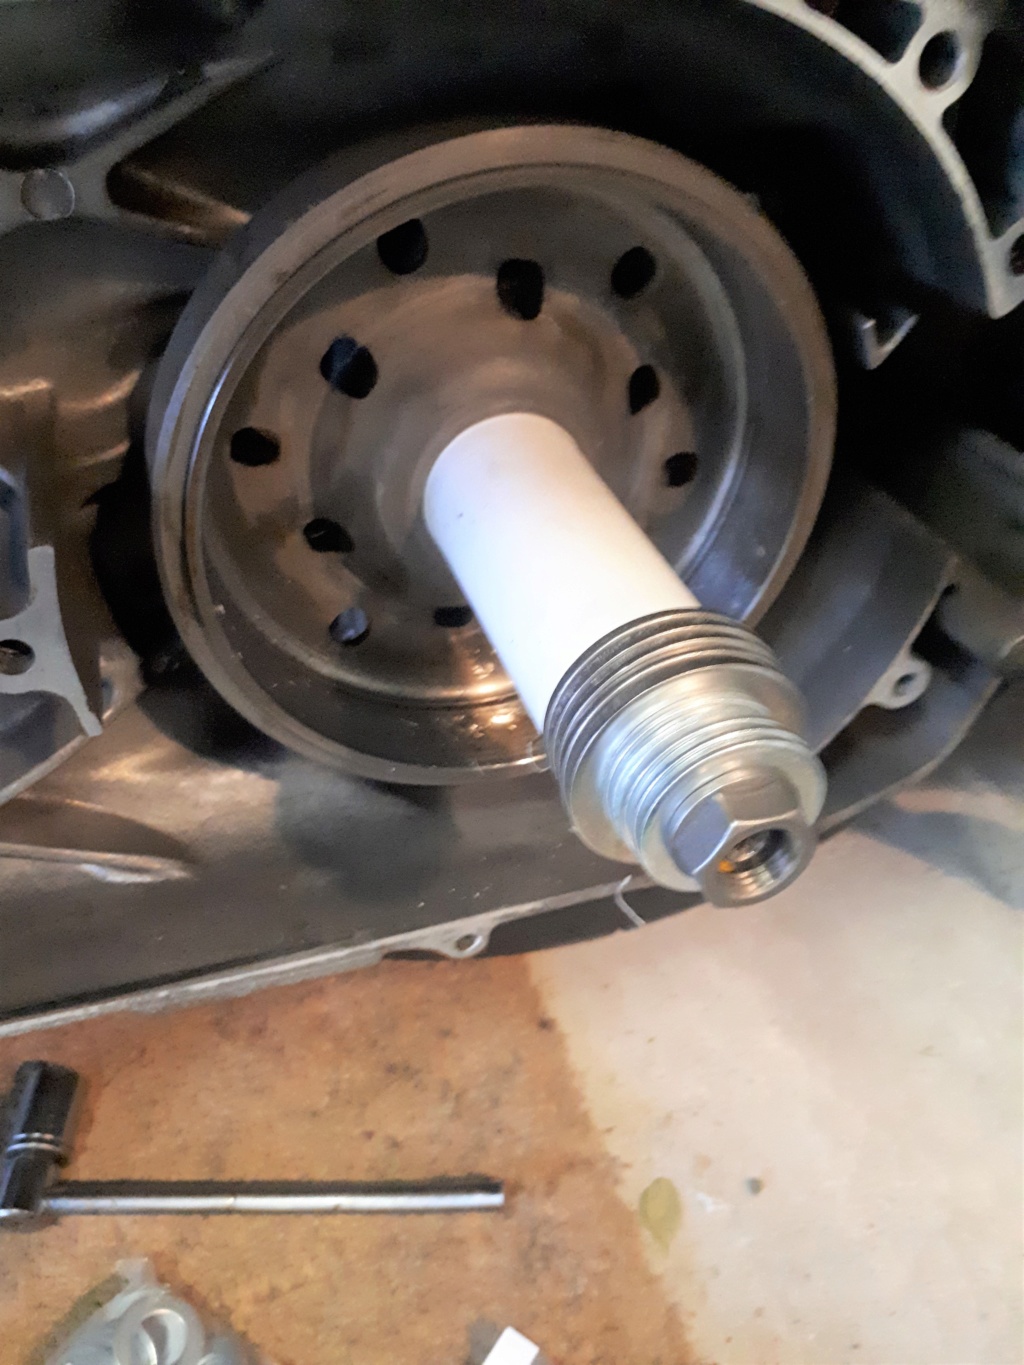
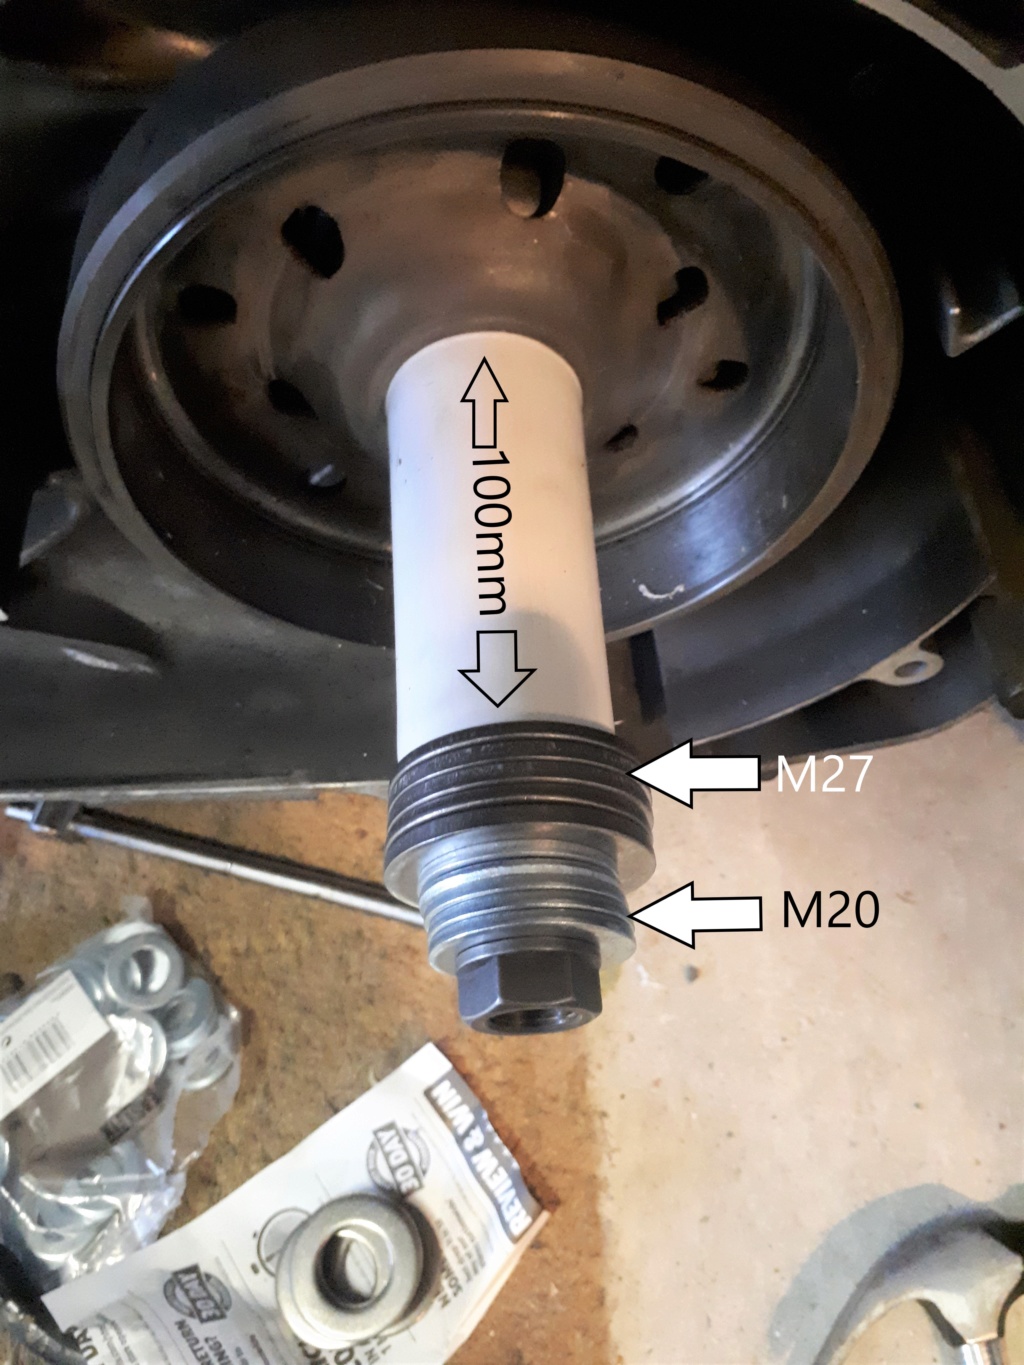
To replace the clutch outer I used 1/12inch PVC pipe, cut squarely with a pipe cutter at 100mm, and M20 and M27 washers. By slightly enlarging the diameter of the inner surface at the end of the opening with a round file, I managed to 'screw' the pipe onto the threads of the clutch outer, just as the Honda 'tool' would do. This seated nicely. Then I put on five M27 washers followed by four or five M20 washers and then fed on the shaft end-nut.


Clutch Bell, How to remove & replace 11_pus11

Start turning the nut and after about two turns, back off and remove the nut. Put on another M20 washer, put the nut on, and turn a bit more. Continue doing this after every couple of turns or so to make up the gap as you go. (make sure you don't run out of thread on the shaft). When you feel a firm resistance to your turning...stop. Remove the washers and pipe to see if the circlip groove is exposed. If not, give it another washer and tighten up again.

Clutch Bell, How to remove & replace 12_pus11

Clutch Bell, How to remove & replace 013_en10

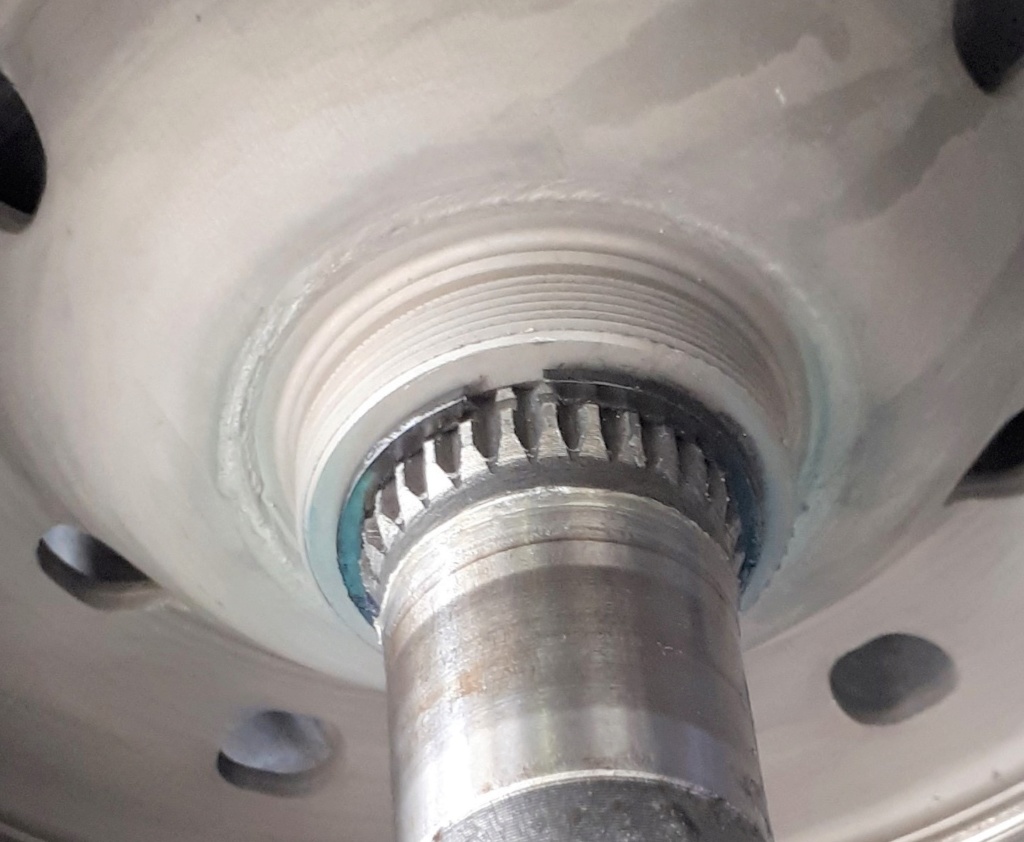
Once the circlip groove is exposed, you're almost there. Replace the circlip and check that it is seated neatly and squarely.

From here, you can replace the rest of the assembly (after some cleaning?). I hope this gives an idea of how easy this can be. Take your time, figure it out as you go and keep your piece of tube and the washers in a box for future use.

BTW, in case of confusion over washer sizes I include the dimensions:

M20 = Outside diameter of 37mm. Inside diameter of 21mm and thickness of 3mm.

M27 = Outside diameter of 50mm. Inside diameter of 28mm and thickness of 4mm.
Back to top Go down
Cosmic_Jumper
Site Admin
Cosmic_Jumper


Number of posts : 4416
Age : 81
Location : damn near Philadelphia, PA
Points : 10561
Registration date : 2009-06-12

Clutch Bell, How to remove & replace Empty
PostSubject: Re: Clutch Bell, How to remove & replace   Clutch Bell, How to remove & replace I_icon_minitimeThu Apr 22, 2021 2:43 pm

Here is a photo of tool by Dave Kitchenman Batter of the Silverwing 582cc FB group:

Clutch Bell, How to remove & replace B3d1ad10

And here is a link to a better view:

https://photos.google.com/share/AF1QipNQZ6gK3l8XnnJBsAuZGcsVOGbtVlmbofPiBtLM0Pxr26ggIhXbhJRTMy1Cam4FeQ?key=MTRaOE1abWhQTDdDazZseDRCRW9YNXFkQ3d3ckd3
Back to top Go down
 
Clutch Bell, How to remove & replace
Back to top 
Page 1 of 1
 Similar topics
-
» Tool to remove clutch bell
» clutch bell puller
» Looking for thread size of clutch bell hub
»  Clutch Bell puller tool
» Clutch Bell (inner) thread diameter and pitch?

Permissions in this forum:You cannot reply to topics in this forum
Honda Silver Wing Scooter Forum :: Honda Silver Wing :: Maintenance, Tips and Hints-
Jump to: