Here is the final on using the rear turn signals and rear amber marker lights you have all been waiting for. First off I thought of modifying the turn signal circuit to match the front turn signal / markers. I pushed that idea to the wayside because the power needed to run through the dash circuit board to make it work. The tolerances of the traces the circuit would have run through on the circuit board were way to close to maximum amperage to feel comfortable with. I wouldn't want anyone blowing out the circuit board from over heating a trace running too much current through it. I also found that the transistor wouldn't handle the full current of four 1156A lamps which is what most of us use. Way too close to the limit of the transistor. So we had to look at alternate ways.
I went to Pull A Part auto salvage this morning on my Silverwing looking for a few parts for Rosie's 09 Chevy Aveo. She needed a trim piece. While removing the trim piece I had an idea. That idea was to look through the import car section and find a 1157 lamp socket that is very close if not spot on to the 1156 lamp socket in the Silverwing. So I removed the Silverwing 1156 lamp socket in my Silverwing and started hunting. Low and behold I found what I was looking for in a 1999 Hyundai Elantra. The lamp socket of the Elantra was the same diameter and nearly the exact same tab configuration so I took a chance and brought two home. They cost me $5.18 total. After a slight modification to the tabs with a razor knife, the socket fit perfectly in the turn signal housing. So now we use an 1157A lamp for the turn signal (27 watt side) and use the second filament for the marker (8.5 watt side). All you need do is remove 2 tabs completely and modify the other two tabs to get close to the original tabs of the Silverwing lamp holder. It took me about 5 minutes to modify each lamp holder.
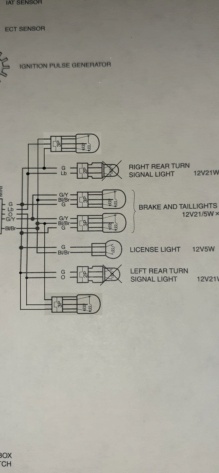
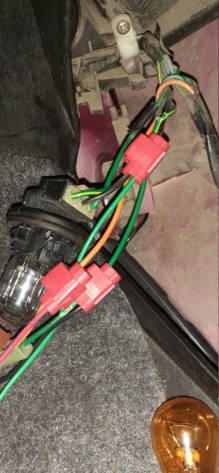
There are three taps to be made per side. The Silverwing has a green ground wire in the harness so we tap the ground of the new lamp socket to that green wire. The marker of the new lamp socket taps to the marker wire of the marker/stop light wire, Bl/Br for both sides. The right side turn signal on the new socket taps to the Lb wire of the right turn signal wire. The left side turn signal on the new socket taps to the O wire.
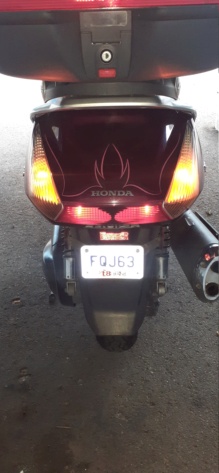
That's all there is to it. There are pictures below including a new wire diagram. As far as the old sockets go, leave them as they be or remove them from the clips and save them. Just make sure you remove the old lamps from those sockets if you leave them. I chose to unclip mine and put them away in my spare parts tote.


