I wanted to share my Givi cutting experience for others thinking about doing the same thing.
As has been discussed at length elsewhere, some people feel that the Givi is too tall (for various reasons that we don't need to go into again here). I installed the Givi last winter, and finally decided that I wanted it shorter. A couple of general suggestions that I would make to people considering this are:
1) Ride with it at the stock height for a while, in a variety of conditions, and make sure that you really want to cut it. There may be benefits to keeping it taller, try to have a pretty good idea of what you stand to gain (and loose) by cutting it down.
2) Don't cut too much off at once - it's cheap and relatively easy to take off more, but not cheap or easy to put it back (I jumped right in and had some regrets later).
I'm going to show how to do it with hand tools and the windshield still on the bike. It can be done with power tools and/or off the bike (if you have, please feel free to comment).
You'll need the following:
1) Masking or painter's tape (a lighter color is probably a little better)
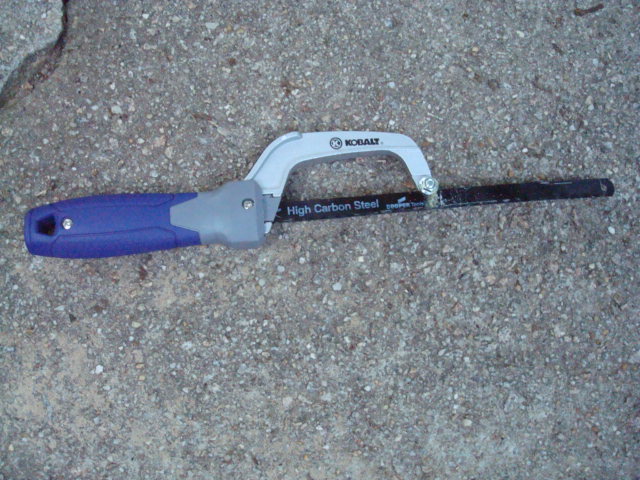
2) A saw. I used this mini hacksaw and was very pleased with how it performed:
3) Some string
4) A pen
5) Sandpaper (I used 80 and 220 grit on my orbital sander and then some 800 or 1500 grit to wet-sand and finish it)
I don't show this in the pictures, but put a towel or something over the dash while cutting to keep things clean.
After you've decided how much you want to cut off, tape up both sides of the windshield, covering where you're going to make the cut plus enough on each side to protect it from the saw blade when you accidentally pull out of the cut and hit the windshield:
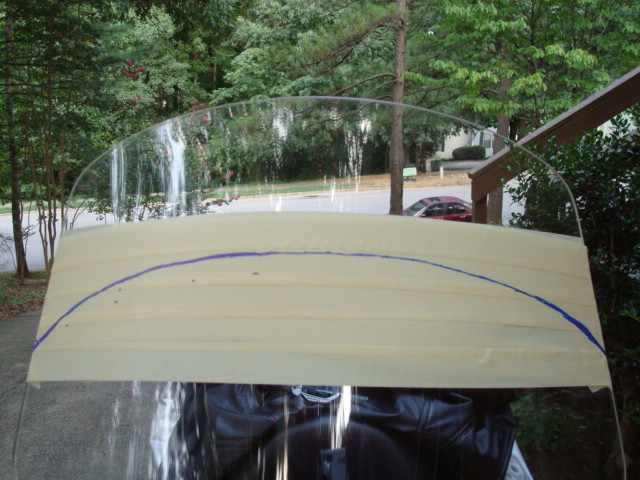
(I cut off about 4-4.5 inches in this pass - I would NOT recommend taking off that much at once...)
Now you need to trace out the curve for the top of the windshield. There are several options for this, one being to try to copy the original top down onto your tape. I tried this a couple of different ways, and wasn't satisfied with the results (part of the problem being that the width changes, so you end up free-handing parts of it). I then decided to trace out part of an ellipse, with horizontal major axis and foci where the "ears" join the rest of the windshield:
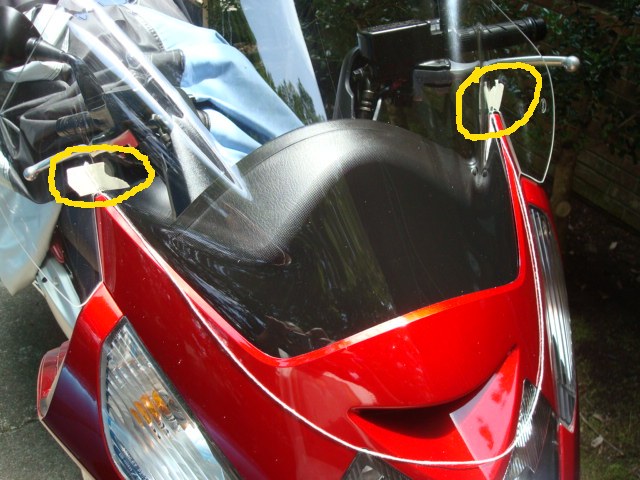
(If your geometry is a bit rusty, here are some refresher links: http://mathworld.wolfram.com/Ellipse.html, http://planetmath.org/encyclopedia/Ellipse2.html, http://en.wikipedia.org/wiki/Ellipse).
Tape the string down at one of the foci, put your pen with the string wrapped around it in the middle of the windshield where you want the highest point to be, then tape down the string at the other foci:
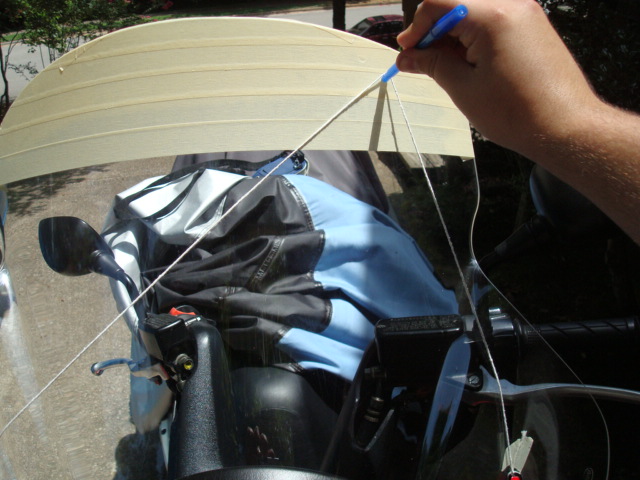
(the pen isn't at the top but you can get the idea)
You can move things around to change the shape of the curve that you'll trace out, just make sure you can tape the string down securely and use symmetry to your advantage.
Keeping the string taunt, trace out your partial ellipse. Try to do it all in one or two passes and make a nice clean line - if you end up with several lines then it makes cutting more of a challenge later on. If you mess up, just re-tape the front and try again. You'll end up with something like this:
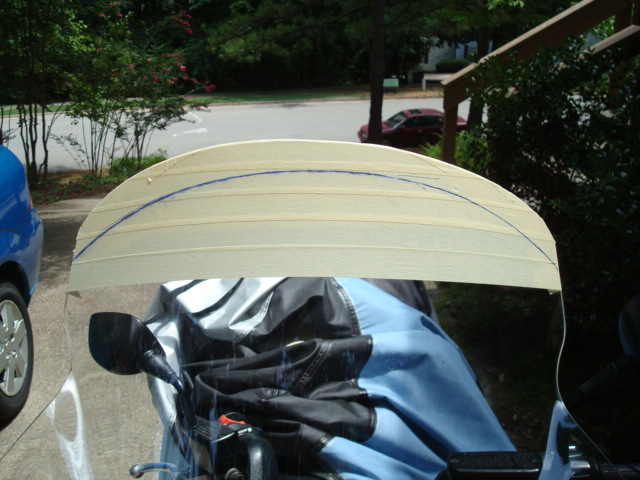
(This picture shows where I made a second cut. All told, I took off about 5-6 inches - probably a LOT more than most people will want to.)
Now just cut along the line. I found it was easier to control everything with the hacksaw blade installed "backwards" (cutting on the forward stroke). It also seemed to help to have some sort of lubricant on the blade (I used engine oil). Just take your time and make sure you're staying on the line. The cutting was fairly easy, and moved quickly (for hand tools) once I got going.
Once you finish the cut, smooth off the edges with sand paper. Do not remove the tape until you're done sanding! I started with 80 grit on my orbital sander and used that to shape the corners and round the edge a little, the changed to 220 grit on the orbital to get rid of the swirl marks left by the 80, and finally finished it off with an 800 or 1500 grit (not sure which) wet sand. The final result looks as good, if not better, than the factory edge.
Take off the tape, rinse off the plastic particles with plenty of water, and clean off any tape residue and fingerprints.
You can't see the edge very well, but here's a view after my first cut:
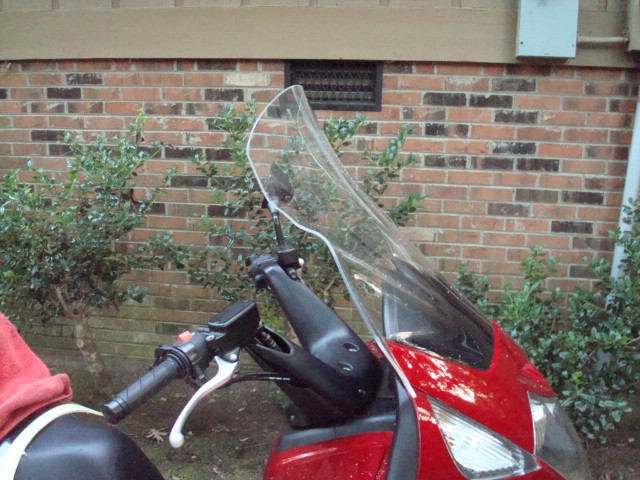
Overall, I'm very happy with the cut, although not quite as happy with how much I took off. I added a homemade Laminar lip/windshield extender to gain back some of the height, which I think is going to work out well, but I'll post on the separately once I've had a chance to ride with it a little more.
