Honda Silver Wing Scooter Forum


HomeHome  GalleryGallery  FAQFAQ  SearchSearch  RegisterRegister  Log inLog in  
Search


Display results as :
 
Rechercher Advanced Search
Latest topics
» Newbie to Silverwing
front fork removal - Fork seal replacement Part 1 and 2 I_icon_minitimeby GHM-PM Today at 6:19 am

» 2003 ABS Silverwing re fresh
front fork removal - Fork seal replacement Part 1 and 2 I_icon_minitimeby xwelder Today at 3:57 am

» half dad's bike
front fork removal - Fork seal replacement Part 1 and 2 I_icon_minitimeby sonuvabug Yesterday at 4:17 pm

» Rear Brake Disc Bolts
front fork removal - Fork seal replacement Part 1 and 2 I_icon_minitimeby JohnyC Wed Nov 20, 2024 10:04 am

» Drive belt prices
front fork removal - Fork seal replacement Part 1 and 2 I_icon_minitimeby john grinsel Mon Nov 18, 2024 7:50 am

» It's that time of year again.
front fork removal - Fork seal replacement Part 1 and 2 I_icon_minitimeby Meldrew Sat Nov 16, 2024 4:37 pm

» 85 and new bike second on experience
front fork removal - Fork seal replacement Part 1 and 2 I_icon_minitimeby POCAHONTAS Thu Nov 14, 2024 6:05 pm

» fsc600 vs fjs600 rear shocks
front fork removal - Fork seal replacement Part 1 and 2 I_icon_minitimeby terryweasely Wed Nov 13, 2024 10:48 pm

» Looking for info/Potentially selling 2004 Silverwing.
front fork removal - Fork seal replacement Part 1 and 2 I_icon_minitimeby AldusFran Mon Nov 11, 2024 9:21 am

» Rarity for Honda, catastrophic engine failure at 35k miles
front fork removal - Fork seal replacement Part 1 and 2 I_icon_minitimeby landisr Sat Nov 09, 2024 12:46 pm

Navigation
 Portal
 Index
 Memberlist
 Profile
 FAQ
 Search
free forum


 Fork seal replacement Part 1 and 2

Go down 
4 posters
AuthorMessage
KurtPerthWA
Silver Wing Guru
Silver Wing Guru
KurtPerthWA


Number of posts : 1711
Age : 75
Location : Belmont, Perth WA
Points : 8158
Registration date : 2009-01-19

front fork removal - Fork seal replacement Part 1 and 2 Empty
PostSubject: Fork seal replacement Part 1 and 2   front fork removal - Fork seal replacement Part 1 and 2 I_icon_minitimeThu Jan 20, 2011 7:17 am

The front fairing removal,fender removal, and wheel removal is adequately covered elsewhere in pictorial sequences.

Place Swing on center stand and support frame under the engine at the crossbeam (I use a trolley jack) to raise the front wheel.
Next I remove the fender followed by the front wheel. Then the brake caliper. Support the caliper with ties to the frame.

Next remove the front fairing. It is possible to loosen the 4 bolts holding the fork tubes in without removing the fairing, but why risk slipping with the spanners and scratch the fairing. I needed to remove all the tupperware to do some additional work anyway, so the whole operation tends to make it all easier.


front fork removal - Fork seal replacement Part 1 and 2 File0110


In the picture above, you can see the 4 pinch bolts that hold the fork tubes. The upper ones must be completely removed to take the forks out.
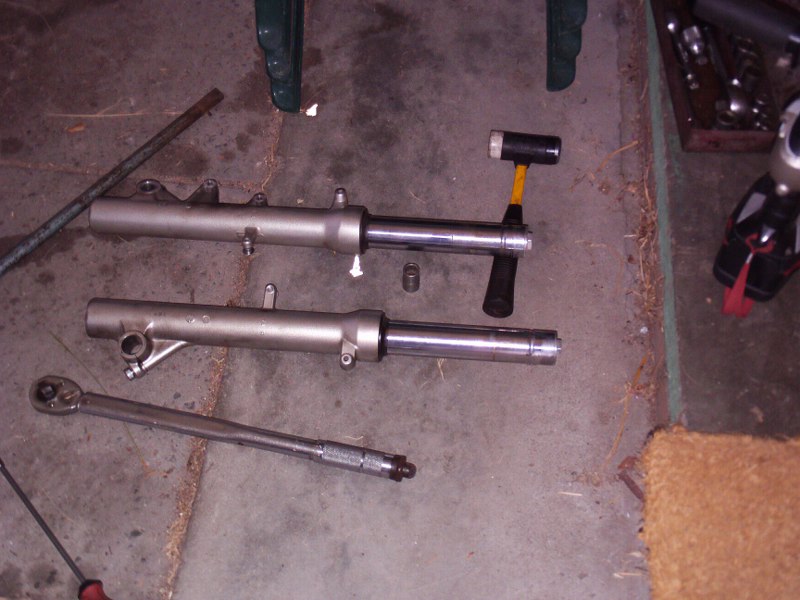
front fork removal - Fork seal replacement Part 1 and 2 File0112

In the picture above, you can see the grooves which the upper pinch bolts slot into.
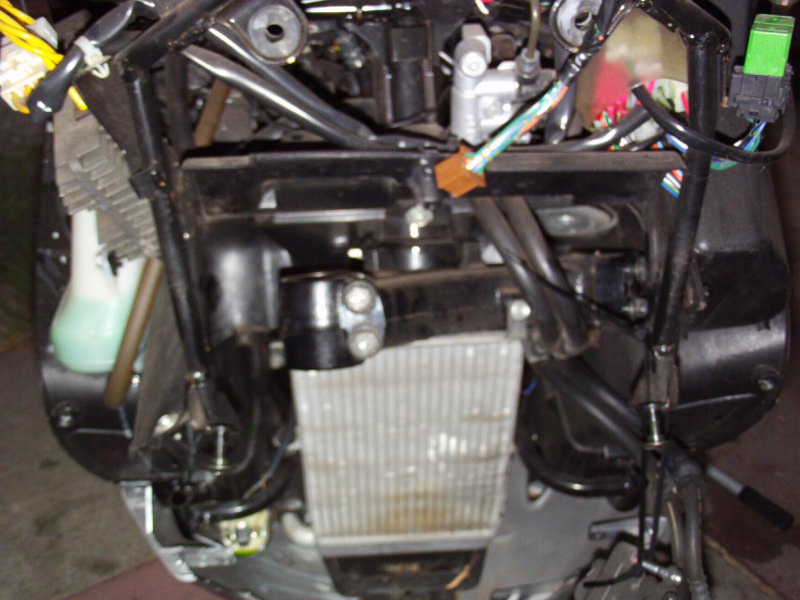

front fork removal - Fork seal replacement Part 1 and 2 File0113


This just shows another view of the bolts.
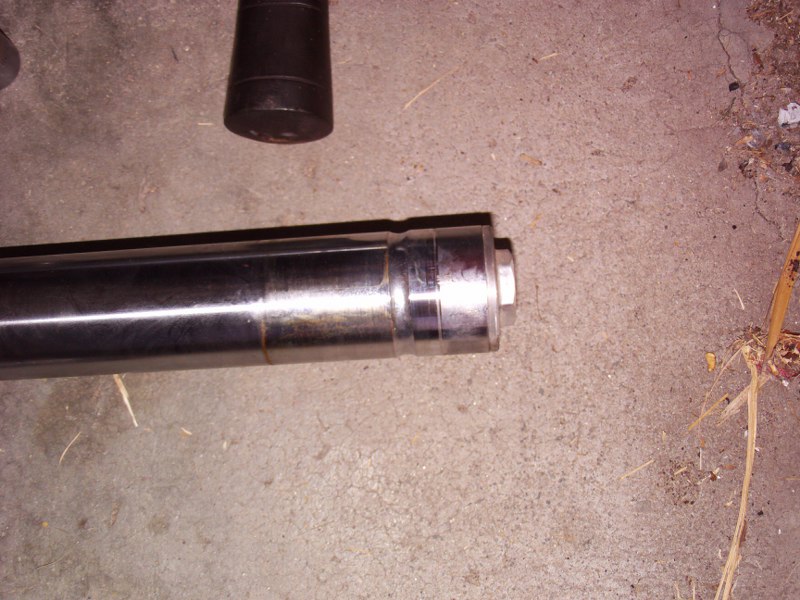
front fork removal - Fork seal replacement Part 1 and 2 File0114

This just shows another view of the grooves.

this ends part 1


Part2,

Straight forward disassembly of fork leg.

Remove top plug carefully, I SAID CAREFULLY!!

Remove spacer if it hasn't already removed itself along with a finger, and the washer/spring upper seat.

Clean down everything, don't buy aftermarket parts from a dealer 3000km away and then before reassembly, get new seals (again local aftermarket seals, but the correct ones to sample)
I dont know how Honda can charge the exhorbitant prices for their parts $Aus36.00 per set per side.

Back to business

Remove lower Allen bolt(I loosened this earlier while the forks were still clamped to bike.. believe me its easier). When you eventually get it out!!!!hurumph hurrumph!!! you can gently tap the guide out with the inner fork leg. All the innards are then accessable.

Rebuilding is similiar to dissassembly, but not the same.
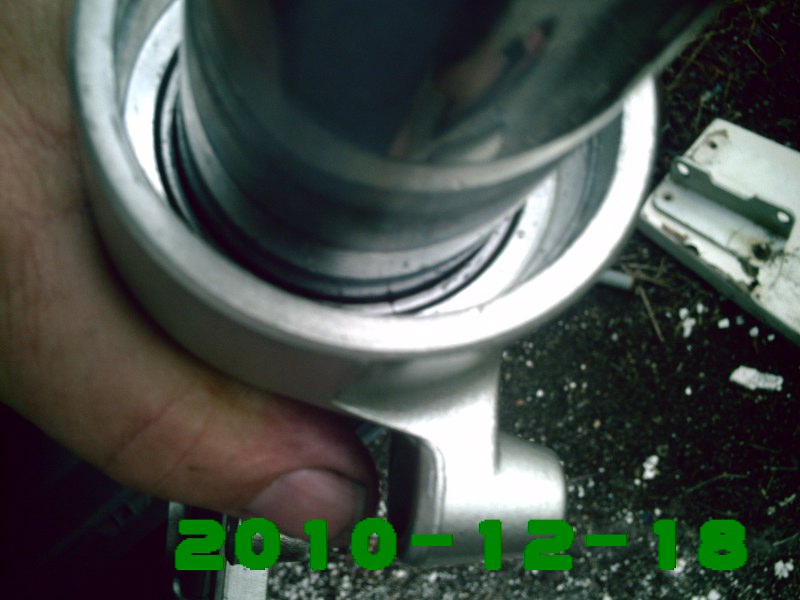
Place the nylon oil tube guide into the outer leg following with the inner leg. insert the allen bolt with a bit of thread lock and wind it in by hand until it just nips up. Torgue it!
This is when it gets interesting.
front fork removal - Fork seal replacement Part 1 and 2 Phto0010

Tap the guide in gently, and make sure it sits all the way in.

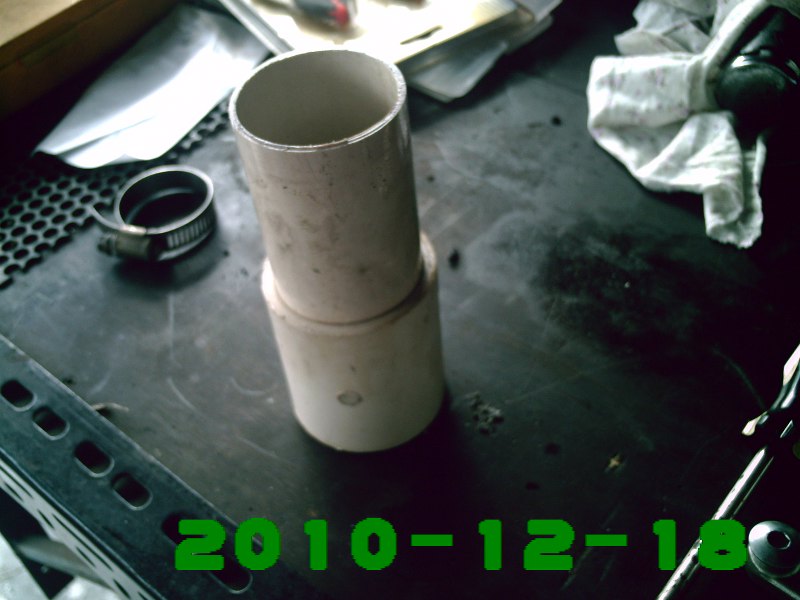
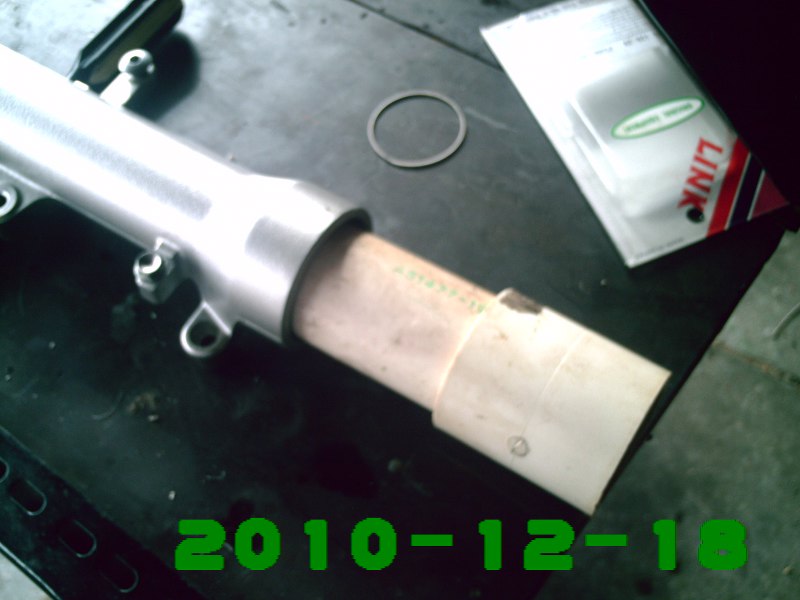
Next comes the large washer and seal. Mane sure seal is correct way up. Note small lip on upper surface of seal. At this point I removed the tensioning spring from the top of the seal and used my home made seal installing tool (sounds good, but its only a couple of pieces of agi pipe trimmed off in a mini lathe) I gently tapped down the seal AFTER smearing it liberally with fork oil.
front fork removal - Fork seal replacement Part 1 and 2 Phto0011

here is another pic of the tool.

front fork removal - Fork seal replacement Part 1 and 2 Phto0012

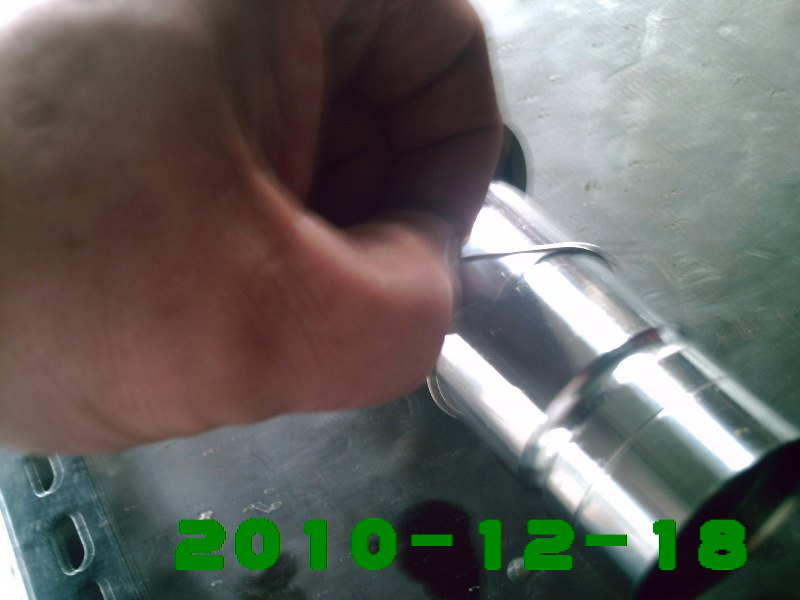
The little seal spring is now reinstalled,
front fork removal - Fork seal replacement Part 1 and 2 Phto0013

I removed this spring so the lip fit up into the tool. I used a small screwdriver to feed it back ito its groove. This was followed by the spring seal clip and now its ready to add the oil.. 305 ml + - 2.5ml I used Silkolene SAE15 for no other reason than it was available. No correspondence on oils will be entered into...OK?

AHHH now for the innards.
Put in the seat/washer then the spacer then the cap/ If it lets go before you can start the thread, the washer ends up behind the bag of grass seed next to the parts washer in the opposite direction to where you saw it fly. PS duck too as the spacer, and cap, and anything else dislodged from the garage cieling showers down on you.

front fork removal - Fork seal replacement Part 1 and 2 Phto0014
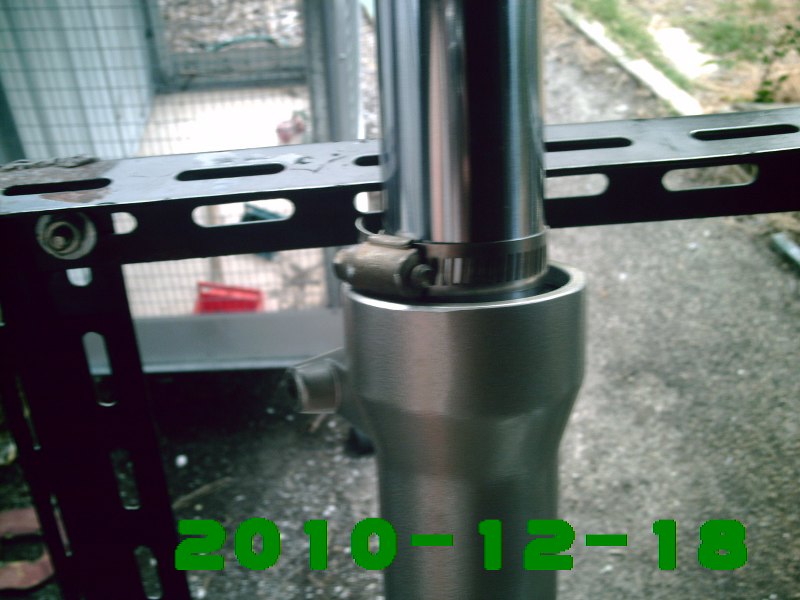
It is easier to compress the spring with the inner leg all the way out, so I used a hose clamp to stop it darting back in while I was pushing on it. Again, it is easier if the leg is on the floor and you can put a decent amount of force on the spring. Keep pressure on the cap while threading it in. t
Thread it in for at least half of the thread height before letting it go. Nip it up with a 22 mm socket. The second unit takes about 25% as long to put together.

Put on the dust caps and refit to forks. Remember the groove in the fork leg for the upper bolt.

ebbitta Ebbitta Ebitta ,Thats all folks
Back to top Go down
reddogguy1
Scooter Rider
Scooter Rider


Number of posts : 1
Location : Texas
Points : 4607
Registration date : 2012-04-13

front fork removal - Fork seal replacement Part 1 and 2 Empty
PostSubject: Re: Fork seal replacement Part 1 and 2   front fork removal - Fork seal replacement Part 1 and 2 I_icon_minitimeMon Apr 23, 2012 6:21 pm

Sorry if this has been answered, but is the 2008 Manual the same as 2007 or 2009? I didn't see a link for the '08 and that's the one I'm needing..Thank
Back to top Go down
Cosmic_Jumper
Site Admin
Cosmic_Jumper


Number of posts : 4415
Age : 81
Location : damn near Philadelphia, PA
Points : 10745
Registration date : 2009-06-12

front fork removal - Fork seal replacement Part 1 and 2 Empty
PostSubject: Re: Fork seal replacement Part 1 and 2   front fork removal - Fork seal replacement Part 1 and 2 I_icon_minitimeTue Apr 24, 2012 1:23 pm

Kurt

Thanks for your informative post & pictorial. However I wasn't aware that the inner tube needed to be disassembled to replace the fork seals.

I've replaced two sets of fork seals for fellow SW riders and never had to disassemble the tubes themselves. I managed to remove the original seals by picking them out with a thin hook-type tool as well as by driving a thin screw into the top of the seal and grabbing that with needle nose pliers to pull the seal up. But never had to disassemble the tubes themselves.

When it came time to install the new seals I used a piece of PVC tubing (1.5" id IIRC) split down one side. With the split PVC tube slid down over the inner fork tube a few judicious hammer taps drove the new seal down & seated everything squarely.

I'd also be careful using the hose clamp on the inner fork tube. A wee bit too much tension on that clamp will score the fork tube and then the new seal will be ruined in short order. It is a good idea for keeping the fork tube fully extended while trying to put the fork tube cap back on though. Just be very cautious when tightening the clamp.

Thanks again for your helpful post.

Tim
Back to top Go down
KurtPerthWA
Silver Wing Guru
Silver Wing Guru
KurtPerthWA


Number of posts : 1711
Age : 75
Location : Belmont, Perth WA
Points : 8158
Registration date : 2009-01-19

front fork removal - Fork seal replacement Part 1 and 2 Empty
PostSubject: Re: Fork seal replacement Part 1 and 2   front fork removal - Fork seal replacement Part 1 and 2 I_icon_minitimeWed Apr 25, 2012 6:32 am

Good pointers Tim,

I have also done many seals on various bikes over the years. A Yamaha I had once only needed the circlips removed and then a quick jab with the brakes would pop the seal out without even removing the forks from the triple clamps. Bit messy but oh so simple. A recent Suzuki 650 needed a jack hammer to release the seal from the outer leg. I have also used the pick and pull method over the years, and find it preferable too.
Even though only one seal needed to be replaced there was significant water intrusion into the fork by the milky oil(mind you the seal was gone in under 8000km) so I did want to make sure it was all clean inside as there is always a certain amount of sludge left behind. The dust seal was also badly worn so I think that the rubber may have perished or aged a bit while the scoot sat on the showroom floor for over a year. I did both to be sure.

Back to top Go down
Loosemarbles
Site Admin
Loosemarbles


Number of posts : 1607
Age : 63
Location : South East England
Points : 4757
Registration date : 2016-10-01

front fork removal - Fork seal replacement Part 1 and 2 Empty
PostSubject: Re: Fork seal replacement Part 1 and 2   front fork removal - Fork seal replacement Part 1 and 2 I_icon_minitimeThu Jun 02, 2022 2:19 pm


This topic has lead me to mentioning my findings for anyone with limited experience with front forks. You'll need to read the above to get my input here. It also made me question the rebuild method from the manual.

The first time I changed the fork oil I removed the forks without removing any tupperware; I wish I could remember how I did it. Anyhow, I removed the fork seals by prising them out without separating the fork halves. It worked and I changed the oil and seals quite easily. Job done.

While I'm in the process of changing the head bearings I decided to dismantle the forks. That's when I noticed the damage I had done previously by using that prising method of seal removal. I found the 'backup ring' was dented and burred plus some scoring of the inside of the seal housing. It wasn't serious and I managed to clean it up.

I followed the manual rebuild instructions but it then occurred to me that I have relied on the driving-in of the seals to correctly insert the 'slider bushing' and the 'and the backup ring', all in one go! I would have preferred to see them go in separately but then I'm just paranoid Suspect

I guess I'm harking back to 'following the manual' but this job has also allowed me to check things out while I'm there. The gunk sitting in the bottom of the lower fork was a surprise! It was all worth it. I also discovered that a previous owner had rebuilt the forks incorrectly affraid


Back to top Go down
 
Fork seal replacement Part 1 and 2
Back to top 
Page 1 of 1
 Similar topics
-
» Fork Seal Replacement
» Final Drive Shaft Dust Seal and Oil Seal Replacement Advice Needed
» Right Side Axle 'Dust Seal and Oil Seal' Replacement
» Front fork seal leaking
» S.O.S Need advise on Front Fork seal

Permissions in this forum:You cannot reply to topics in this forum
Honda Silver Wing Scooter Forum :: Honda Silver Wing :: "Pictorials" Maintenance-
Jump to: